
Already signed up with Desky? Awesome! Lets us get you started.
Setting up Desky is a simple process. Just follow 3 simple steps to create a perfect support portal for your clients.
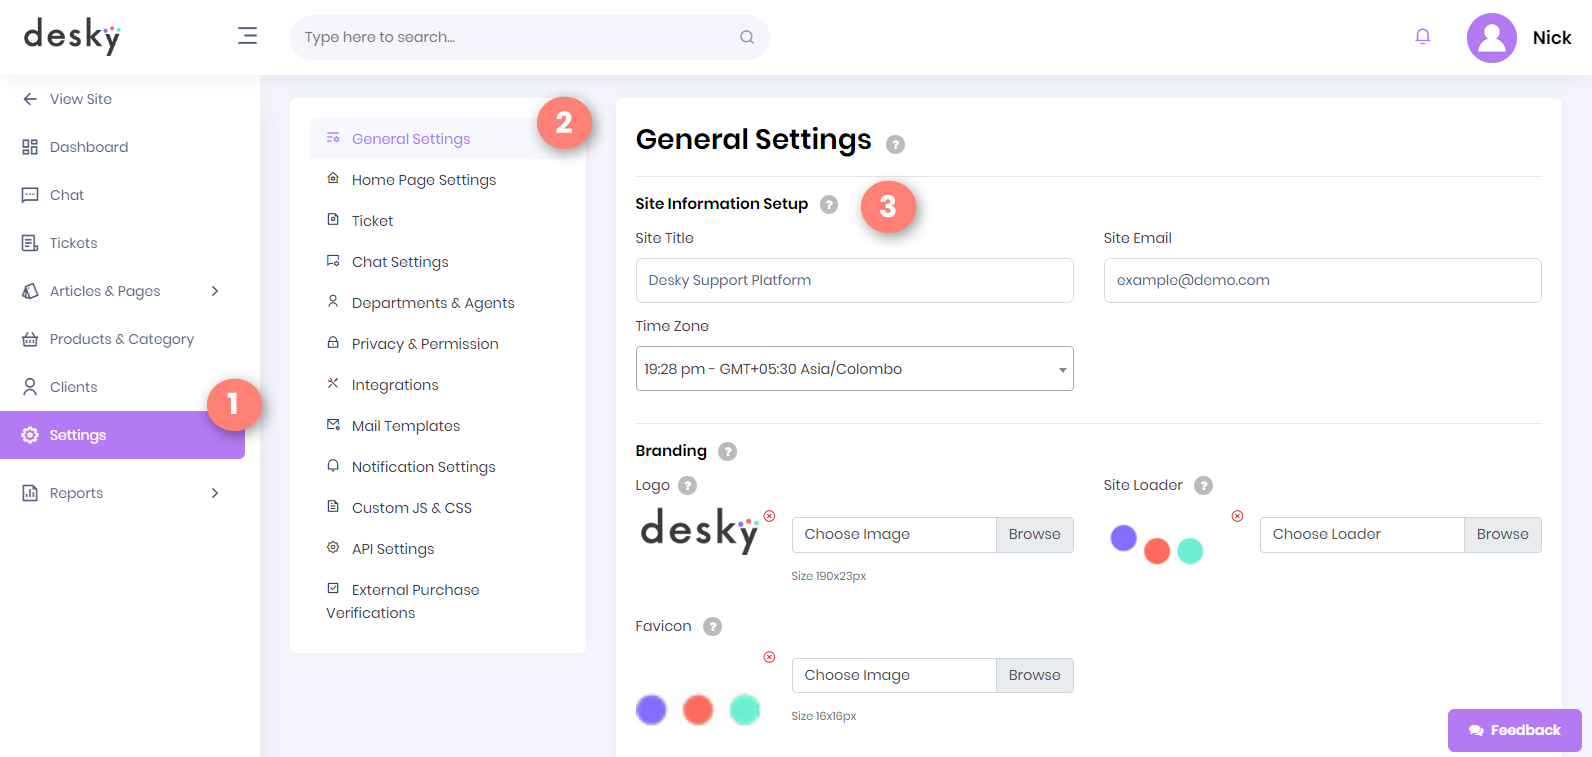
1. Setup your Company basic details, and Brand elements.
As soon as you signup, 1st we recommend is to fill in your company’s general information.
Login to you admin panel –> Settings –> General Settings.
2. Setup your Portals Home Page
Next step is make sure your portals home pages looks the way you want. Home page is the prefect place to greet your customers and guide them will process or your policy information.
Navigate to Admin panel –> Settings –> Home page settings.
3. Insert Products/Categories of your tickets.
While submitting a ticket Product/Category is the 1st thing that your customers will select. All tickets will be linked to product or category you have inserted.
Navigate to Admin panel –> Products & Category –> Add.
Note : If you are an Envato author. All product can be auto imported by linking your account with Desky. Simply go to Settings –> Integrations –> Envato
You are all set with the basic setup.
From this point on you can start accepting tickets from your customers.
Advance Setup.
If you further wish to setup and get the maximum juice out of Desky then below setup will be helpful.
5. Setup SMTP setup for emails
One of the important things are email notification. We recommend you to setup your SMTP details so that all emails are sent from your personal or company’s email
Navigate to Admin panel –> Settings –> Integrations.
6. Ticket Setup
Want to collect more information in ticket form or want to setup a default signature for all ticket replies. All these settings and much more can tweaked form Ticket Settings
Navigate to Admin panel –> Settings –> Ticket